Lotus/Monster
.png) | |
| Entry Level | 190+ |
| Party Size | 1 - 6 |
| Potion Cooldown | 5 seconds |
| Time Limit | 30 minutes |
| Death Count | 5 |
| Clear Limit | 1 clear every week (shared with Hard, Extreme) |
| Required Combat Power (CMS) | Total or 1-Person: 1,500,000 2-Person: |
| Entry Level | 190+ |
| Party Size | 1 - 6 |
| Potion Cooldown | 5 seconds |
| Time Limit | 30 minutes |
| Death Count | 5 |
| Clear Limit | 1 clear every week (shared with Normal, Extreme) |
| Required Combat Power (CMS) | Total or 1-Person: 5,000,000 2-Person: |
| Entry Level | 190+ |
| Party Size | 1 - 2 |
| Potion Cooldown | 10 seconds |
| Time Limit | 30 minutes |
| Death Count | 5 |
| Clear Limit | 1 clear every week (shared with Normal, Hard) |
| Required Combat Power (CMS) | Total or 1-Person: 200,000,000 2-Person: |
| Name (Other Servers) | |
| KoreaMS | 스우 (Seuu) |
| JapanMS | スウ (Sū) |
| ChinaMS | 斯乌 (Sīwū) |
| TaiwanMS | 史烏 (Shǐwū) |
| MapleSEA | Lotus |
Afterwards, he committed cruel acts throughout Maple World, and is even said to have assassinated Empress Aria, the former ruler.
However, his rampage did not last long. He ultimately met his end at the hands of the hero 'Phantom.'
It's said that Orchid, his twin sister and fellow commander, founded an organization called the Black Wings, and recruited Gelimer, in an attempt to revive him.
However, due to Gelimer's betrayal, Lotus became his puppet, leading to what is now known as the Black Heaven incident.”
- ― Chronicler Ritt
Lotus is a boss found in Scrapyard / Mechanical Grave, an area near Edelstein, and serves as the final boss of the Black Heaven storyline.
Battle Overview
Lotus can be fought in Normal, Hard, and Extreme mode. You must be in a party of 1 - 6 players in order to fight him in Normal and Hard mode (1-2 players in Extreme mode), and each player will have a Death Count of 5; if all players reach 0, then the battle will end and everyone will be kicked out. The battle has a time limit of 30 minutes, and a Potion Cooldown of 5 seconds is applied (10 seconds in Extreme mode).
NOTE: Most damage values will vary based on difficulty, and will be listed in order from lowest difficulty to highest. Example: if listed as 20 / 25 / 30, then the 20 correlates to Normal mode, the 25 correlates to Hard mode, and 30 correlates to Extreme mode. If there is no listed values, then it is the same regardless of difficulty unless stated otherwise.
All Phases
Purge Gauge
Every player will have a separate gauge, and it initially shows up as blue with the gauge continuously increasing. The gauge will also increase when hit by certain patterns, but can also decrease if Lotus gets hit by them as well. Once it maxes out, Purge Mode is activated (see more in the appropriate section below) and the gauge becomes orange and will continuously decrease. The gauge does not change while the player is dead. Here is the rate of the gauge increasing per second based on current phase and difficulty.
| Current Phase | Normal | Hard | Extreme |
|---|---|---|---|
| Phase 1 | 0.6% | 0.8% | 2% |
| Phase 2 | 1.8% | 2.3% | 2.7% |
In Phase 3, Purge Mode is the default state, and the gauge does not continuously decrease on its own, requiring patterns to hit Lotus in order to decrease it.
Purge Mode
When a player has a full Purge Gauge or they are in Phase 3, there will be a visual effect surrounding the screen and more patterns are spawned. If Purge Mode has been activated in Phase 1 or 2, they will be stuck in it for 25 / 34 / 34 seconds. In Phase 3, should a player empty their Purge Gauge, they will be in safe mode for 40 / 34 / 25 seconds before they go back into Purge Mode. Here are the patterns that are only activated if a player is in Purge Mode:
- Drone: A drone appears to follow you around for a few seconds before stopping and releasing an electric field, dealing damage every tick. Damage varies based on current phase and difficulty (see table below).
- Downwards Laser (Phase 2 and 3 only): A mark will appear where you are standing and fire a large laser after a few seconds. Deals 30% HP damage in Phase 2, and 20% / 30% / 30% HP damage in Phase 3. There will be 3 / 3 / 4 lasers fired in succession in Phase 2, and 4 / 4 / 5 lasers fired in succession in Phase 3.
- Purge Routine: A warning message will appear and a giant mark that is only stopped by a silhouette of a barrier will appear. A few seconds later, a giant laser will be fired constantly for a few seconds in the areas the mark is, with a barrier materializing at the barrier silhouette, blocking the rest of the laser. Getting hit by the laser will continuously deal 100% HP damage, and you cannot pass through the barrier without skills like Teleport. Only one laser will be fired in Phase 1, and the safe spot is on the right end of the map. In Phase 2 and 3, two lasers will be fired, and the only safe areas are on the right on the ground floor, and the left on the top floor. The cannons firing this attack have no hitbox on them, so standing on them is also completely safe.
Here is a table for the drone's damage per tick based on difficulty and phase:
| Current Phase | Normal | Hard | Extreme |
|---|---|---|---|
| Phase 1 | 5% | 5% | 10% |
| Phase 2 | 5% | 5% | 15% |
| Phase 3 | 10% | 10% | 15% |
Common Attacks
- Mechanical Arms: There will be a target mark on the player followed with a beeping noise before a mechanical chain rains down on them after half a second, dealing damage. Getting hit by it will increase the Purge Gauge and deal 5% HP damage, and Lotus getting hit by it will decrease the Purge Gauge. In Extreme mode, the chains are fired at a much faster rate, and a larger one is cast after 10 small chains in a cycle, shown as a giant warning mark before it comes down (similar to Gloom's tentacles). A tracking laser cannon will rise up and go offscreen to indicate the direction of where the giant arm will be fired from as the smaller arms are being fired. Getting hit by the giant arm will deal 70% HP damage in Phase 1, and 80% HP damage in Phase 2 and 3. Below are two tables that lists how much the Purge Gauge will be filled if hit, and how much the Purge Gauge is depleted if Lotus gets hit, respectively (in Extreme mode, the value of the giant mechanical arm is in parenthesis):
| Current Phase | Normal | Hard | Extreme |
|---|---|---|---|
| Phase 1 | 3% | 3% | 5% (25%) |
| Phase 2 | 3% | 3% | 5% (25%) |
| Phase 3 | 6% | 8% | 8% (25%) |
| Current Phase | Normal | Hard | Extreme |
|---|---|---|---|
| Phase 1 | 3% | 3% | 3% (16%) |
| Phase 2 | 3% | 3% | 3% (16%) |
| Phase 3 | 6% | 6% | 5% (22%) |
- Tracking Lasers: Periodically, the tracking lasers in the corners of the map will activate and take aim at the player, leaving a warning outline that chases the player. After a few seconds, it will lock in and stop following the player while the outline flashes, and then fire where the outlines are. In Phases 1 and 2, two lasers are fired, and in Phase 3, three lasers are fired. Getting hit deals 15% HP damage and increases the Purge Gauge, and Lotus getting hit will decrease the Purge Gauge. The Purge Gauge changes are influenced based on how many lasers land on the appropriate target. Below are two tables that lists the lowest to highest amount the Purge Gauge will be changed, with the first table listing the increase, and the second table listing the decrease:
| Current Phase | Normal | Hard | Extreme |
|---|---|---|---|
| Phase 1 | 7% ~ 20% | 8% ~ 18% | 10% ~ 20% |
| Phase 2 | 7% ~ 20% | 10% ~ 20% | 8% ~ 20% |
| Phase 3 | 6% ~ 20% | 7% ~ 21% | 7% ~ 23% |
| Current Phase | Normal | Hard | Extreme |
|---|---|---|---|
| Phase 1 | 7% ~ 20% | 7% ~ 16% | 6% ~ 15% |
| Phase 2 | 7% ~ 20% | 7% ~ 15% | 6% ~ 15% |
| Phase 3 | 6% ~ 20% | 6% ~ 20% | 6% ~ 20% |
Phase 1
Lotus will remain stationary in a tank in the center of the map.
- Mines: Lotus sets 6 / 6 / 8 mines on the ground. Getting close to one will cause them to explode after 1.5 seconds. If no players have triggered them, they will eventually explode after 5 seconds. Deals 20% / 25% / 25% HP damage.
- Suppression Robots: 1 / 2 / 3 flying robot(s) will appear and chase after the player. When a player gets too close, they will explode. If no player gets close to them in 5 seconds, they will disappear. Deals 15% / 20% / 20% HP damage.
- Exploding Scrap Heaps: 4 giant piles of scrap heaps will fall to the ground, leaving two unmarked areas. After a few seconds, they will explode, dealing 40% / 50% / 60% HP damage. This cannot be avoided with an up jump.
- Shield: Lotus sets up a shield, reducing incoming damage by 90% and replacing the HP bar with a white one. If the shield is not destroyed within 20 seconds, Lotus will heal based on how much of the shield is left. The mechanical arms and tracking lasers can deal damage to the shield. This pattern is the only attack that is disabled by binds.
- Sawblades: The eyes towards the bottom of Lotus's tank will light up with yellow warning marks on the ground around them. After a few seconds, sawblades will come out of the ground on the warning marks to strike. 3 sawblades are summoned if spawning at the center, 4 are summoned if spawning on the left or right. Getting hit by one sawblade will initially deal 10% / 10% / 15% HP damage in the center and 15% / 15% / 20% HP damage on the left or right, and every subsequent hit will deal 5% / 5% / 7% in the center and 15% / 15% / 20% in the left or right.
- Electrical Discharge: A warning message will appear along with a blue warning mark surrounding the ground. After a second, the ground will be electrified, dealing 100% HP damage and inflicting Stun should a player survive it. Up jumping is required to dodge it.
- Shock: Lotus charges up electrical energy before releasing it, affecting the immediate area around him and the ground dead center. Getting hit will deal 35% / 40% / 40% HP damage and inflict Stun.
Phase 2
A raised platform is on the map to serve as a second floor. Lotus will now start moving around.
- Teleport - Lotus teleports to a random player.
- Push - A portal will appear in front of or behind Lotus for a few seconds before a bunch of wires fly out. Getting hit deals 15% / 20% / 20% HP damage and inflicts Super Knockback.
- Sound Control Protocol - Lotus releases a small discharge of energy around him, marking the hitbox, and then releases a dome of electricity. Getting hit deals 5% HP damage and inflicts a debuff that looks like a blue black hole above the player, and after 3 seconds, the player will take 5% / 10% / 10% HP damage, sent flying, and inflict stun. Impenetrable Skin will not protect getting sent flying, however using a dash skill at the correct timing can resist it. This attack can also be avoided by standing where Lotus is.
- Debris - Lotus spawns debris that fall in pairs with each spawning on both sides of where he was when the attack was cast, and each pair is spawned a slightly further distance away. Getting hit deals 10% HP damage and inflicts stun.
- Gravity Control - Lotus spawns a bunch of blue machines throughout the map that have an electrical field marking their hitbox. Standing inside one inflicts slow. After a few seconds, they will explode, dealing 20% / 25% / 25% HP damage to any player caught in them.
- Bombardment Protocol - Lotus activates his weapon, and every 2 seconds a small electric sphere will be fired in a straight line at the player. This lasts for 30 seconds. Getting hit deals 20% / 30% / 30% HP damage.
Phase 3
The map is now larger and there is a gap on the second floor platform. There are two warp portals on the top left corner and bottom right corner to leap between both areas.
- Rockets - A small crosshair appears on the player before a small rocket flies in to deal damage. 2 / 3 / 3 rockets are fired in succession. Getting hit deals 8% HP damage and increases the Purge Gauge by 4% / 3% / 4%. If Lotus gets hit, the Purge Gauge decreases by 4% / 2.5% / 3%.
- Push - Lotus summons a large machine in front of or behind him and then fires. Getting hit deals 20% / 25% / 25% HP damage and inflicts Super Knockback. Standing next to Lotus can also avoid this attack.
- Drill - Lotus fires a drill that attacks in front of him and then it extends backward behind him, leading to two hits. Each hit deals 25% / 30% / 30% HP damage and deals Super Knockback, which can lead to the player getting trapped in a corner and hit twice. The back half of the drill can be crouched under.
- Restraint Protocol + Explosion - Warning marks of lasers will appear over the entire map before they get fired. Getting hit deals 10% / 30% / 30% HP damage and binds the player with wires. Lotus will immediately follow up with an explosion that covers a large area around him. Getting hit deals 50% / 70% / 70% HP damage, but the damage increases to 75% / 100% / 100% if the player is bound by the lasers. The explosion can be avoided by standing next to Lotus, but this will not work when bound. Binding Lotus after the lasers have started but before he starts the explosion will cancel the explosion.
- Platform Break - Lotus will destroy one of the second floor platforms into three pieces, and then the pieces will fly towards the player in succession, indicated by a crosshair on the player. Getting hit by one deals 20% / 20% / 25% HP damage and inflicts Super Knockback. Lotus will not destroy the platform he is on.
- Teleport Zap - Lotus teleports to a random player, but he leaves a hitbox that deals damage when disappearing and appearing. Deals 10% HP damage if hit.
- Ship Cannons - Lotus activates a row of cannons that appear at the top of the map that fires slow-moving projectiles that go downwards through the entire map. A warning mark appears for each cannon that is due to fire, and they are fired in a pattern of every other cannon firing per wave. Getting hit deals 25% / 30% / 30% HP damage.
- Stun Pillars - A bunch of glowing pillars will appear on random spots on the map and explode after a few seconds. Getting hit deals 20% / 25% / 25% HP damage and inflicts Stun.
Monster
Scrapyard
Normal
Normal: Phase 1

| ||||||||||||||||||||||
| Level | 210 | HP | 472,500,000,000 (+2,362,500,000 per White HP Shield)[1] | MP | 100,000 | EXP | 0 | |||||||||||||||
|---|---|---|---|---|---|---|---|---|---|---|---|---|---|---|---|---|---|---|---|---|---|---|
| Attack | 22,000 | Defense Rate | PDR: 300% MDR: 300% |
Speed | Stationary | Additional Points | None | |||||||||||||||
| Elements | ||||||||||||||||||||||
| Resistant | Resistant | |||||||||||||||||||||
| Resistant | Resistant | |||||||||||||||||||||
| Resistant | Resistant | |||||||||||||||||||||
| Resistant | No | |||||||||||||||||||||
| Other | ||||||||||||||||||||||
| Category | Enchanted | |||||||||||||||||||||
| Equipment Drops | None | |||||||||||||||||||||
| Usable Drops | None | |||||||||||||||||||||
| Set-up Drops | None | |||||||||||||||||||||
| Etc. Drops | None | |||||||||||||||||||||
| Quest Drops | None | |||||||||||||||||||||
| Locations | Guarding Core | |||||||||||||||||||||
Normal: Phase 2
.png)
| ||||||||||||||||||||||
| Level | 210 | HP | 472,500,000,000[1] | MP | 100,000 | EXP | 0 | |||||||||||||||
|---|---|---|---|---|---|---|---|---|---|---|---|---|---|---|---|---|---|---|---|---|---|---|
| Attack | 22,000 | Defense Rate | PDR: 300% MDR: 300% |
Speed | -20 | Additional Points | None | |||||||||||||||
| Elements | ||||||||||||||||||||||
| Resistant | Resistant | |||||||||||||||||||||
| Resistant | Resistant | |||||||||||||||||||||
| Resistant | Resistant | |||||||||||||||||||||
| Resistant | No | |||||||||||||||||||||
| Other | ||||||||||||||||||||||
| Category | Enchanted | |||||||||||||||||||||
| Equipment Drops | None | |||||||||||||||||||||
| Usable Drops | None | |||||||||||||||||||||
| Set-up Drops | None | |||||||||||||||||||||
| Etc. Drops | None | |||||||||||||||||||||
| Quest Drops | None | |||||||||||||||||||||
| Locations | Liberated Core | |||||||||||||||||||||
Normal: Phase 3
|
| ||||||||||||||||||||||
| Level | 210 | HP | 630,000,000,000[1] | MP | 100,000 | EXP | 0 | |||||||||||||||
|---|---|---|---|---|---|---|---|---|---|---|---|---|---|---|---|---|---|---|---|---|---|---|
| Attack | 22,000 | Defense Rate | PDR: 300% MDR: 300% |
Speed | -20 | Additional Points | None | |||||||||||||||
| Elements | ||||||||||||||||||||||
| Resistant | Resistant | |||||||||||||||||||||
| Resistant | Resistant | |||||||||||||||||||||
| Resistant | Resistant | |||||||||||||||||||||
| Resistant | No | |||||||||||||||||||||
| Other | ||||||||||||||||||||||
| Category | Enchanted | |||||||||||||||||||||
| Equipment Drops | None | |||||||||||||||||||||
| Usable Drops | None | |||||||||||||||||||||
| Set-up Drops | None | |||||||||||||||||||||
| Etc. Drops | None | |||||||||||||||||||||
| Quest Drops | None | |||||||||||||||||||||
| Locations | Frenzied Ship | |||||||||||||||||||||
Normal: Reward
| Lose Control Heaven Core (Boss) | ||||||||||||||||||||||

| ||||||||||||||||||||||
| Level | 210 | HP | 100,000 | MP | 10,000,000 | EXP | 0 | |||||||||||||||
|---|---|---|---|---|---|---|---|---|---|---|---|---|---|---|---|---|---|---|---|---|---|---|
| Attack | 22,000 | Defense Rate | PDR: 300% MDR: 300% |
Speed | Stationary | Additional Points | Ambition EXP: 388 Weapon Points: 300 Guild Points: 1,500 Party GP Bonus: 3,000 | |||||||||||||||
| Elements | ||||||||||||||||||||||
| Resistant | Resistant | |||||||||||||||||||||
| Resistant | Resistant | |||||||||||||||||||||
| Resistant | Resistant | |||||||||||||||||||||
| Resistant | No | |||||||||||||||||||||
| Other | ||||||||||||||||||||||
| Category | Enchanted | |||||||||||||||||||||
| Fixed Damage | 1,000 | |||||||||||||||||||||
| Equipment Drops | None | |||||||||||||||||||||
| Usable Drops |
| |||||||||||||||||||||
| Set-up Drops | None | |||||||||||||||||||||
| Etc. Drops |
| |||||||||||||||||||||
| Quest Drops | None | |||||||||||||||||||||
| Locations | Silent Ship | |||||||||||||||||||||
Hard
| MapleStory Final Bosses by period | ||||||||
|---|---|---|---|---|---|---|---|---|
Zakum (2006-2008) |
Horntail (2008-2009) |
Pink Bean (2009-2010) |
Chaos Horntail (2010-Chaos) |
Normal Cygnus (Chaos - Tempest) |
Hard Magnus (Tempest - Unleashed) |
Chaos Vellum (Unleashed - Rising Heroes) |
Dorothy (Rising Heroes - FIREPOWER) |
Hard Lotus (FIREPOWER - Override) |
Hard Lucid (Override-ARK) |
Hard Will (ARK-Black Mage) |
Black Mage (Black Mage - NEO) |
Hard Seren (NEO - Destiny) |
Normal Kalos (formerly Chaos Kalos) (Destiny - Ignition) |
Extreme Seren (Ignition - New Age) |
Extreme Kaling (New Age - Ride The Lightning) |
Hard Jupiter (Ride The Lightning - ) | |
Hard Lotus was considered to be the strongest boss in MapleStory for the longest period of time (more than 2 years) and was technically unbeatable until the release of the 5th Job Advancement during the V Update which also increased the damage cap from 50,000,000 (50 million) to 10,000,000,000 (10 billion).
Hard: Phase 1
|
| ||||||||||||||||||||||
| Level | 210 | HP | 9,985,500,000,000 (+49,927,500,000 per White HP Shield)[1] | MP | 100,000 | EXP | 0 | |||||||||||||||
|---|---|---|---|---|---|---|---|---|---|---|---|---|---|---|---|---|---|---|---|---|---|---|
| Attack | 22,000 | Defense Rate | PDR: 300% MDR: 300% |
Speed | Stationary | Additional Points | None | |||||||||||||||
| Elements | ||||||||||||||||||||||
| Resistant | Resistant | |||||||||||||||||||||
| Resistant | Resistant | |||||||||||||||||||||
| Resistant | Resistant | |||||||||||||||||||||
| Resistant | No | |||||||||||||||||||||
| Other | ||||||||||||||||||||||
| Category | Enchanted | |||||||||||||||||||||
| Equipment Drops | None | |||||||||||||||||||||
| Usable Drops | None | |||||||||||||||||||||
| Set-up Drops | None | |||||||||||||||||||||
| Etc. Drops | None | |||||||||||||||||||||
| Quest Drops | None | |||||||||||||||||||||
| Locations | Guarding Core | |||||||||||||||||||||
Hard: Phase 2
|
| ||||||||||||||||||||||
| Level | 210 | HP | 9,985,500,000,000[1] | MP | 100,000 | EXP | 0 | |||||||||||||||
|---|---|---|---|---|---|---|---|---|---|---|---|---|---|---|---|---|---|---|---|---|---|---|
| Attack | 22,000 | Defense Rate | PDR: 300% MDR: 300% |
Speed | -20 | Additional Points | None | |||||||||||||||
| Elements | ||||||||||||||||||||||
| Resistant | Resistant | |||||||||||||||||||||
| Resistant | Resistant | |||||||||||||||||||||
| Resistant | Resistant | |||||||||||||||||||||
| Resistant | No | |||||||||||||||||||||
| Other | ||||||||||||||||||||||
| Category | Enchanted | |||||||||||||||||||||
| Equipment Drops | None | |||||||||||||||||||||
| Usable Drops | None | |||||||||||||||||||||
| Set-up Drops | None | |||||||||||||||||||||
| Etc. Drops | None | |||||||||||||||||||||
| Quest Drops | None | |||||||||||||||||||||
| Locations | Liberated Core | |||||||||||||||||||||
Hard: Phase 3
|
| ||||||||||||||||||||||
| Level | 210 | HP | 13,314,000,000,000[1] | MP | 100,000 | EXP | 0 | |||||||||||||||
|---|---|---|---|---|---|---|---|---|---|---|---|---|---|---|---|---|---|---|---|---|---|---|
| Attack | 22,000 | Defense Rate | PDR: 300% MDR: 300% |
Speed | -20 | Additional Points | None | |||||||||||||||
| Elements | ||||||||||||||||||||||
| Resistant | Resistant | |||||||||||||||||||||
| Resistant | Resistant | |||||||||||||||||||||
| Resistant | Resistant | |||||||||||||||||||||
| Resistant | No | |||||||||||||||||||||
| Other | ||||||||||||||||||||||
| Category | Enchanted | |||||||||||||||||||||
| Equipment Drops | None | |||||||||||||||||||||
| Usable Drops | None | |||||||||||||||||||||
| Set-up Drops | None | |||||||||||||||||||||
| Etc. Drops | None | |||||||||||||||||||||
| Quest Drops | None | |||||||||||||||||||||
| Locations | Frenzied Ship | |||||||||||||||||||||
Hard: Reward
| Lose Control Heaven Core (Boss) | ||||||||||||||||||||||
|
| ||||||||||||||||||||||
| Level | 210 | HP | 100,000 | MP | 10,000,000 | EXP | 0 | |||||||||||||||
|---|---|---|---|---|---|---|---|---|---|---|---|---|---|---|---|---|---|---|---|---|---|---|
| Attack | 22,000 | Defense Rate | PDR: 300% MDR: 300% |
Speed | Stationary | Additional Points | Ambition EXP: 388 Weapon Points: 300 Guild Points: 3,000 Party GP Bonus: 6,000 | |||||||||||||||
| Elements | ||||||||||||||||||||||
| Resistant | Resistant | |||||||||||||||||||||
| Resistant | Resistant | |||||||||||||||||||||
| Resistant | Resistant | |||||||||||||||||||||
| Resistant | No | |||||||||||||||||||||
| Other | ||||||||||||||||||||||
| Category | Enchanted | |||||||||||||||||||||
| Fixed Damage | 1,000 | |||||||||||||||||||||
| Equipment Drops | ||||||||||||||||||||||
| Usable Drops |
| |||||||||||||||||||||
| Set-up Drops | None | |||||||||||||||||||||
| Etc. Drops |
| |||||||||||||||||||||
| Quest Drops | None | |||||||||||||||||||||
| Locations | Silent Ship | |||||||||||||||||||||
Extreme
Extreme: Phase 1
|
| ||||||||||||||||||||||
| Level | 285 | HP | 543,300,000,000,000 (+2,716,500,000,000 per White HP Shield)[1] | MP | 100,000 | EXP | 0 | |||||||||||||||
|---|---|---|---|---|---|---|---|---|---|---|---|---|---|---|---|---|---|---|---|---|---|---|
| Attack | 22,000 | Defense Rate | PDR: 380% MDR: 380% |
Speed | Stationary | Additional Points | None | |||||||||||||||
| Elements | ||||||||||||||||||||||
| Resistant | Resistant | |||||||||||||||||||||
| Resistant | Resistant | |||||||||||||||||||||
| Resistant | Resistant | |||||||||||||||||||||
| Resistant | No | |||||||||||||||||||||
| Other | ||||||||||||||||||||||
| Category | Enchanted | |||||||||||||||||||||
| Equipment Drops | None | |||||||||||||||||||||
| Usable Drops | None | |||||||||||||||||||||
| Set-up Drops | None | |||||||||||||||||||||
| Etc. Drops | None | |||||||||||||||||||||
| Quest Drops | None | |||||||||||||||||||||
| Locations | Guarding Core | |||||||||||||||||||||
Extreme: Phase 2
|
| ||||||||||||||||||||||
| Level | 285 | HP | 543,300,000,000,000[1] | MP | 100,000 | EXP | 0 | |||||||||||||||
|---|---|---|---|---|---|---|---|---|---|---|---|---|---|---|---|---|---|---|---|---|---|---|
| Attack | 22,000 | Defense Rate | PDR: 380% MDR: 380% |
Speed | -20 | Additional Points | None | |||||||||||||||
| Elements | ||||||||||||||||||||||
| Resistant | Resistant | |||||||||||||||||||||
| Resistant | Resistant | |||||||||||||||||||||
| Resistant | Resistant | |||||||||||||||||||||
| Resistant | No | |||||||||||||||||||||
| Other | ||||||||||||||||||||||
| Category | Enchanted | |||||||||||||||||||||
| Equipment Drops | None | |||||||||||||||||||||
| Usable Drops | None | |||||||||||||||||||||
| Set-up Drops | None | |||||||||||||||||||||
| Etc. Drops | None | |||||||||||||||||||||
| Quest Drops | None | |||||||||||||||||||||
| Locations | Liberated Core | |||||||||||||||||||||
Extreme: Phase 3
|
| ||||||||||||||||||||||
| Level | 285 | HP | 724,400,000,000,000[1] | MP | 100,000 | EXP | 0 | |||||||||||||||
|---|---|---|---|---|---|---|---|---|---|---|---|---|---|---|---|---|---|---|---|---|---|---|
| Attack | 22,000 | Defense Rate | PDR: 380% MDR: 380% |
Speed | -20 | Additional Points | None | |||||||||||||||
| Elements | ||||||||||||||||||||||
| Resistant | Resistant | |||||||||||||||||||||
| Resistant | Resistant | |||||||||||||||||||||
| Resistant | Resistant | |||||||||||||||||||||
| Resistant | No | |||||||||||||||||||||
| Other | ||||||||||||||||||||||
| Category | Enchanted | |||||||||||||||||||||
| Equipment Drops | None | |||||||||||||||||||||
| Usable Drops | None | |||||||||||||||||||||
| Set-up Drops | None | |||||||||||||||||||||
| Etc. Drops | None | |||||||||||||||||||||
| Quest Drops | None | |||||||||||||||||||||
| Locations | Frenzied Ship | |||||||||||||||||||||
Extreme: Reward
| Lose Control Heaven Core (Boss) | ||||||||||||||||||||||
|
| ||||||||||||||||||||||
| Level | 210 | HP | 100,000 | MP | 10,000,000 | EXP | 0 | |||||||||||||||
|---|---|---|---|---|---|---|---|---|---|---|---|---|---|---|---|---|---|---|---|---|---|---|
| Attack | 22,000 | Defense Rate | PDR: 300% MDR: 300% |
Speed | Stationary | Additional Points | Ambition EXP: 388 Weapon Points: 300 Guild Points: 3,000 Party GP Bonus: 6,000 | |||||||||||||||
| Elements | ||||||||||||||||||||||
| Resistant | Resistant | |||||||||||||||||||||
| Resistant | Resistant | |||||||||||||||||||||
| Resistant | Resistant | |||||||||||||||||||||
| Resistant | No | |||||||||||||||||||||
| Other | ||||||||||||||||||||||
| Category | Enchanted | |||||||||||||||||||||
| Fixed Damage | 1,000 | |||||||||||||||||||||
| Equipment Drops | ||||||||||||||||||||||
| Usable Drops |
| |||||||||||||||||||||
| Set-up Drops | None | |||||||||||||||||||||
| Etc. Drops |
| |||||||||||||||||||||
| Quest Drops | None | |||||||||||||||||||||
| Locations | Silent Ship | |||||||||||||||||||||
Story
Story: Phase 1
|
| ||||||||||||||||||||||
| Level | 105 | HP | 1,523,340,000 | MP | 100,000 | EXP | 0 | |||||||||||||||
|---|---|---|---|---|---|---|---|---|---|---|---|---|---|---|---|---|---|---|---|---|---|---|
| Attack | 22,000 | Defense Rate | PDR: 30% MDR: 30% |
Speed | Stationary | Additional Points | None | |||||||||||||||
| Elements | ||||||||||||||||||||||
| Resistant | Resistant | |||||||||||||||||||||
| Resistant | Resistant | |||||||||||||||||||||
| Resistant | Resistant | |||||||||||||||||||||
| Resistant | No | |||||||||||||||||||||
| Other | ||||||||||||||||||||||
| Category | Enchanted | |||||||||||||||||||||
| Equipment Drops | None | |||||||||||||||||||||
| Usable Drops | None | |||||||||||||||||||||
| Set-up Drops | None | |||||||||||||||||||||
| Etc. Drops | None | |||||||||||||||||||||
| Quest Drops | None | |||||||||||||||||||||
| Locations | Guarding Core | |||||||||||||||||||||
Story: Phase 2
|
| ||||||||||||||||||||||
| Level | 105 | HP | 1,523,340,000 | MP | 100,000 | EXP | 0 | |||||||||||||||
|---|---|---|---|---|---|---|---|---|---|---|---|---|---|---|---|---|---|---|---|---|---|---|
| Attack | 22,000 | Defense Rate | PDR: 30% MDR: 30% |
Speed | -20 | Additional Points | None | |||||||||||||||
| Elements | ||||||||||||||||||||||
| Resistant | Resistant | |||||||||||||||||||||
| Resistant | Resistant | |||||||||||||||||||||
| Resistant | Resistant | |||||||||||||||||||||
| Resistant | No | |||||||||||||||||||||
| Other | ||||||||||||||||||||||
| Category | Enchanted | |||||||||||||||||||||
| Equipment Drops | None | |||||||||||||||||||||
| Usable Drops | None | |||||||||||||||||||||
| Set-up Drops | None | |||||||||||||||||||||
| Etc. Drops | None | |||||||||||||||||||||
| Quest Drops | None | |||||||||||||||||||||
| Locations | Liberated Core | |||||||||||||||||||||
Story: Phase 3
|
| ||||||||||||||||||||||
| Level | 105 | HP | 2,031,120,000 | MP | 100,000 | EXP | 0 | |||||||||||||||
|---|---|---|---|---|---|---|---|---|---|---|---|---|---|---|---|---|---|---|---|---|---|---|
| Attack | 22,000 | Defense Rate | PDR: 30% MDR: 30% |
Speed | -20 | Additional Points | None | |||||||||||||||
| Elements | ||||||||||||||||||||||
| Resistant | Resistant | |||||||||||||||||||||
| Resistant | Resistant | |||||||||||||||||||||
| Resistant | Resistant | |||||||||||||||||||||
| Resistant | No | |||||||||||||||||||||
| Other | ||||||||||||||||||||||
| Category | Enchanted | |||||||||||||||||||||
| Equipment Drops | None | |||||||||||||||||||||
| Usable Drops | None | |||||||||||||||||||||
| Set-up Drops | None | |||||||||||||||||||||
| Etc. Drops | None | |||||||||||||||||||||
| Quest Drops | None | |||||||||||||||||||||
| Locations | Frenzied Ship | |||||||||||||||||||||
Mu Lung Dojo
| Lotus (Boss) | ||||||||||||||||||||||
|
| ||||||||||||||||||||||
| Level | 255 | HP | 2,100,000,000,000 | MP | 60,000 | EXP | 0 | |||||||||||||||
|---|---|---|---|---|---|---|---|---|---|---|---|---|---|---|---|---|---|---|---|---|---|---|
| Attack | 34,223 | Defense Rate | PDR: 150% MDR: 150% |
Speed | 0 | Additional Points | Ambition EXP: 50 | |||||||||||||||
| Elements | ||||||||||||||||||||||
| Resistant | Resistant | |||||||||||||||||||||
| Resistant | Resistant | |||||||||||||||||||||
| Resistant | Resistant | |||||||||||||||||||||
| Resistant | No | |||||||||||||||||||||
| Other | ||||||||||||||||||||||
| Category | Enchanted | |||||||||||||||||||||
| Equipment Drops | None | |||||||||||||||||||||
| Usable Drops | None | |||||||||||||||||||||
| Set-up Drops | None | |||||||||||||||||||||
| Etc. Drops | None | |||||||||||||||||||||
| Quest Drops | None | |||||||||||||||||||||
| Locations | Mu Lung Dojo - Floor 70 | |||||||||||||||||||||
Gallery
-
 Post-remaster Lotus in the Black Heaven Core (Phase 1)
 -
 Pre-remaster Lotus in the Black Heaven Core (Phase 1)
 -
 Pre-remaster Lotus (Phase 2)
 -
 Pre-remaster Lotus (Phase 3)
 -
 Pre-remaster Lose Control Heaven Core
 -
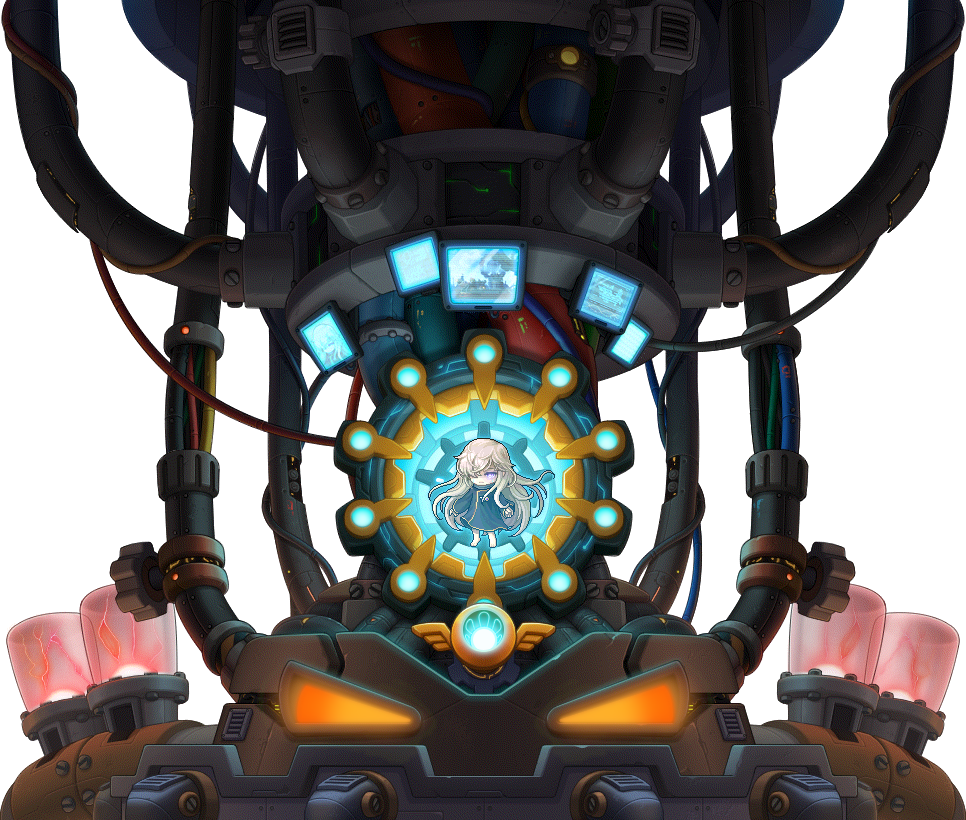
 Lotus Maple Guide icon
 -
 Lotus Maple Guide icon (pre-remaster)
 -
 Lotus Boss UI artwork (current)
 -
 Lotus Boss UI artwork (pre-remaster)
 -
 Lotus Boss UI artwork (old)
 -
 Lotus Boss Entry UI artwork
 -
 Lotus Boss Entry UI artwork (pre-remaster)
 -
 Lotus's Soul Effect
 -
 Magnificent Lotus's Soul Effect
 -
 Lotus's Soul Effect (pre-remaster)
 -
 Magnificent Lotus's Soul Effect (pre-remaster)
 -
 Annihilation Weapon Lotus's Soul Effect
 -
 Magnificent Annihilation Weapon Lotus's Soul Effect
 -
 Lotus Soul Collector artwork
Intruder detected.
Eliminate the target. -
 Lotus Soul Collector artwork (all souls added)
(Sighs) If only it weren't Orchid... -
 Lotus Soul Collector artwork (original)
 -
Annihilation Weapon Lotus Soul Collector artwork
Executing final stage.
Annihiliating all lifeforms. -
 Annihilation Weapon Lotus Soul Collector artwork (all souls added)
After-Work Tea with a Friend -
Boss Phase 1 Cutscene
Intruder detected. Switching system to attack mode. -
Boss Phase 2 Cutscene
Intruder remains, elevating security level. Target confirmed. Elimination protocol engaged. -
Boss Phase 3 Cutscene
Severe damage detected, activate emergency mode. Malfunction, malfunction, malfunction... [2]Executing final stage. Annihilating all lifeforms.
.png)

.png)
_(Original).png)
.png)

.png)

.png)
_-_Lotus.png)

.png)

.png)
.png)
_(Original).png)

.png)
.png)
.png)
.png)
.png)
Trivia
- In Story mode, as well as in the pre-remastered version of Lotus, Gelimer laughs if any party members die during the Lotus boss battle.
References
| Monsters | |||||||
|---|---|---|---|---|---|---|---|
| Monsters | |||||||
| 1 - 10 | 11 - 20 | 21 - 30 | 31 - 40 | 41 - 50 | 51 - 60 | ||
| 61 - 70 | 71 - 80 | 81 - 90 | 91 - 100 | 101 - 110 | 111 - 120 | ||
| 121 - 130 | 131 - 140 | 141 - 150 | 151 - 160 | 161 - 170 | 171 - 180 | ||
| 181 - 190 | 191 - 200 | 201 - 210 | 211 - 220 | 221 - 230 | 231 - 240 | ||
| 241 - 250 | 251 - 260 | 261 - 270 | 271 - 280 | 281 - 290 | 291 - 300 | ||
| Major Bosses | |||||||
| Area Bosses | |||||||
| Root Abyss | |||||||
| Elite Bosses | |||||||
| Black Mage and his commanders | |||||||
| Grandis | |||||||
| Special Content | |||||||
| Overseas Exclusive | |||||||
| Quest Monsters | |||||||
| 1 - 10 | 11 - 20 | 21 - 30 | 31 - 40 | 41 - 50 | 51 - 60 | ||
| 61 - 70 | 71 - 80 | 81 - 90 | 91 - 100 | 101 - 110 | 111 - 120 | ||
| 121 - 130 | 131 - 140 | 141 - 150 | 151 - 160 | 161 - 170 | 171 - 180 | ||
| 181 - 190 | 191 - 200 | 201 - 210 | 211 - 220 | 221 - 230 | 231 - 240 | ||
| 241 - 250 | 251 - 260 | 261 - 270 | 271 - 280 | 281 - 290 | 291 - 300 | ||
| Other Monsters | |||||||
|
Mu Lung Dojo • Monster Park • Party Quest • Mirror World • Maple Tour • Tower of Oz • Special • Theme Dungeons • Epic | |||||||
- Fire Resistant Monsters
- Ice Resistant Monsters
- Poison Resistant Monsters
- Lightning Resistant Monsters
- Holy Resistant Monsters
- Dark Resistant Monsters
- Physical Resistant Monsters
- Enchanted Monsters
- Bosses
- Monsters Level 201 - 210
- Monsters Level 281 - 290
- Monsters Level 101 - 110
- Monsters Level 251 - 260
- Major Bosses
- Mu Lung Dojo Monsters